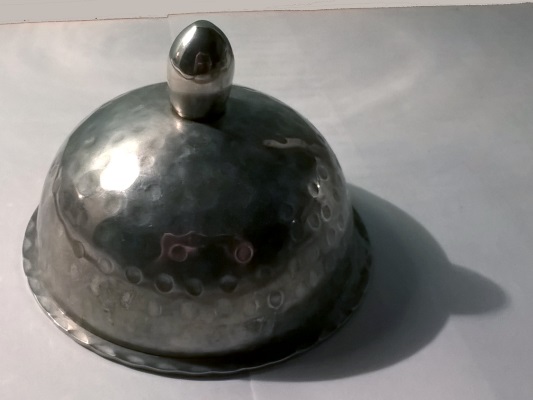
After dabbling with watercolours I figured that I should get back on the program today as I needed to try out a wash tint for real. Firstly though came the search for an object that might respond well to pencil shading and a light wash; something grown in the garden for example. However when I saw this fancy butter dish, with its lightly beaten surface, I knew that I didn't need to look any further:
The first step, before even thinking about the wash, was to come up with the underlying drawing which I hoped to enhance. So, as usual, I sketched out the underlying shapes and worked out where I needed to apply the most shadow. Learning from past mistakes I tend to go easy on the contour lines these days as a shaded edge just looks more realistic and that's definitely the case here; by eye it's difficult to see exactly where one surface ends and another one starts and I think that I've captured that well here:
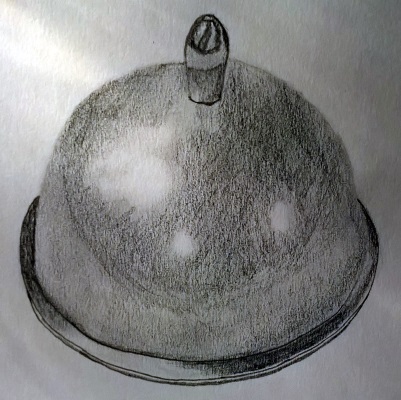
Something which I hadn't noticed until this moment is that the shape of the dish and its cover are pretty accurate for once. A win for constant practice there. This piece, however, is more about applying a wash and seeing how it turns out. Firstly then I put a light wash across the whole picture, except for the highlights, and allowed it to dry. After this I went through a few cycles of layering wash on the top half (where it's darkest) and around the base of the dish. Eventually I figured that I'd done enough:
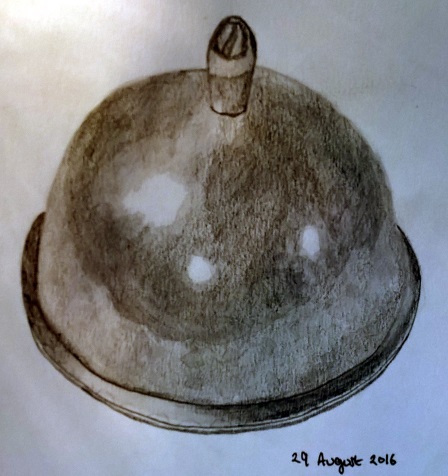
For sure the picture is different with a wash added; everything's smoother (almost blurry) and more liquid. In tone this is a better match to the look of the dish but I'm not sure that I prefer it this way as there's a real loss of fineness and it's more obvious that my shading wasn't smooth enough. Still I did quite enjoy having the ability to deepen tone in specific areas and manipulate the sketch in a more fluid manner. Maybe I just need more practice?